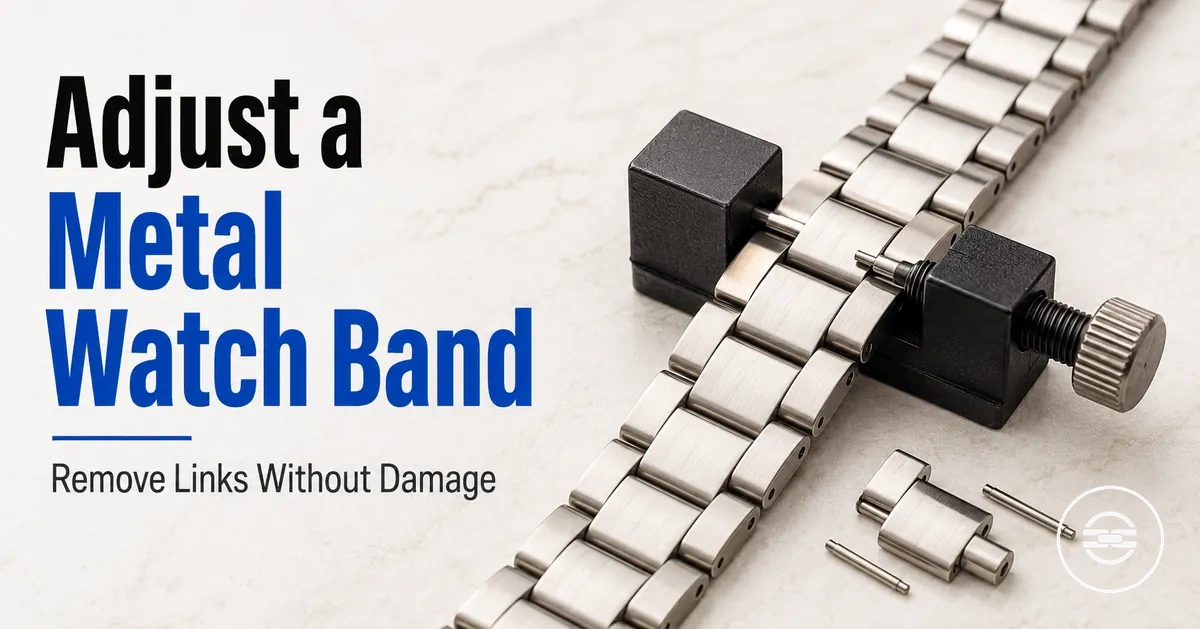
Metal watch band adjustment without damage
Metal watch band adjustment starts with confirming that the bracelet is designed to resize, and many metal watch bands can be adjusted at home when the link system is identified and tool pressure is controlled.
The correct adjustment method depends on whether the bracelet uses pins, collars, screws, a mesh slider, or clasp micro-adjustment. Each construction handles pressure differently, so resizing a bracelet should remain separate from replacing the band or repairing a broken clasp.
Check the current fit before choosing a suitable tool, then identify the bracelet's link system and any pin direction markers. Understanding how the links, pins, and clasp work together helps prepare for safe link removal, which begins with fit diagnosis in the next section.
Work on a soft surface and stop if a pin, collar, screw, or clasp part does not move with light, controlled pressure, as forcing an unfamiliar bracelet system may increase the risk of scratches or component damage.
When a metal watch band should be adjusted
A metal watch band should be adjusted when the bracelet no longer feels comfortable or stays in a stable position during normal wear. When a metal watch band should be adjusted depends on wrist shape, bracelet design, clasp style, and comfort, so adjustment should solve a real fit problem.
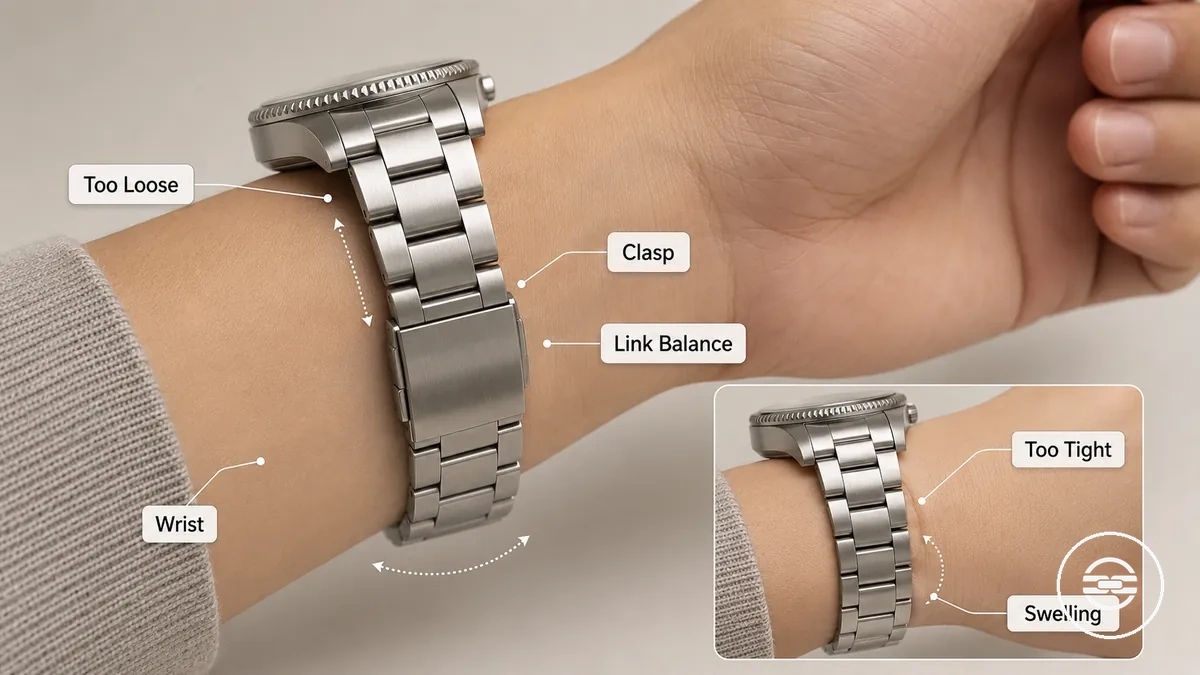
A loose bracelet may slide over the wrist bone, while a tight bracelet may pinch or create pressure when swelling occurs during the day. An off-centre clasp can point to uneven link balance, especially when one side of the bracelet feels longer or heavier. If the watch case feels suitable but the bracelet does not sit comfortably, the fit cause may be bracelet length rather than case size.
The checklist below verifies when a metal watch band should be adjusted by separating loose, tight, and uneven fit signals. If these signs are inconsistent or only appear briefly, test the fit again before changing the bracelet.
- The bracelet slides over the wrist bone more than is comfortable during normal movement.
- The metal watch band feels too tight or pinches when wrist swelling occurs.
- The clasp sits off-centre instead of near the wrist centre.
- The link balance appears uneven, making one side of the bracelet feel longer or heavier.
- The case size feels suitable, but the bracelet length causes the fit problem.
Fit checks before removing watch band links
Fit checks before removing watch band links help confirm whether the bracelet needs a size change before any links are removed. Check the bracelet under normal wearing conditions first, because removing too many links can leave the bracelet unnecessarily short.
Fit checks before removing watch band links become clearer by comparing bracelet length, clasp position, and overall comfort. The image below highlights the main conditions to review before deciding on link removal. Small fit changes may come from clasp micro-adjustment, while larger size changes usually require removing removable links. If the clasp sits close to the centre and the bracelet feels balanced, clasp micro-adjustment may be enough; otherwise, link removal may be appropriate.
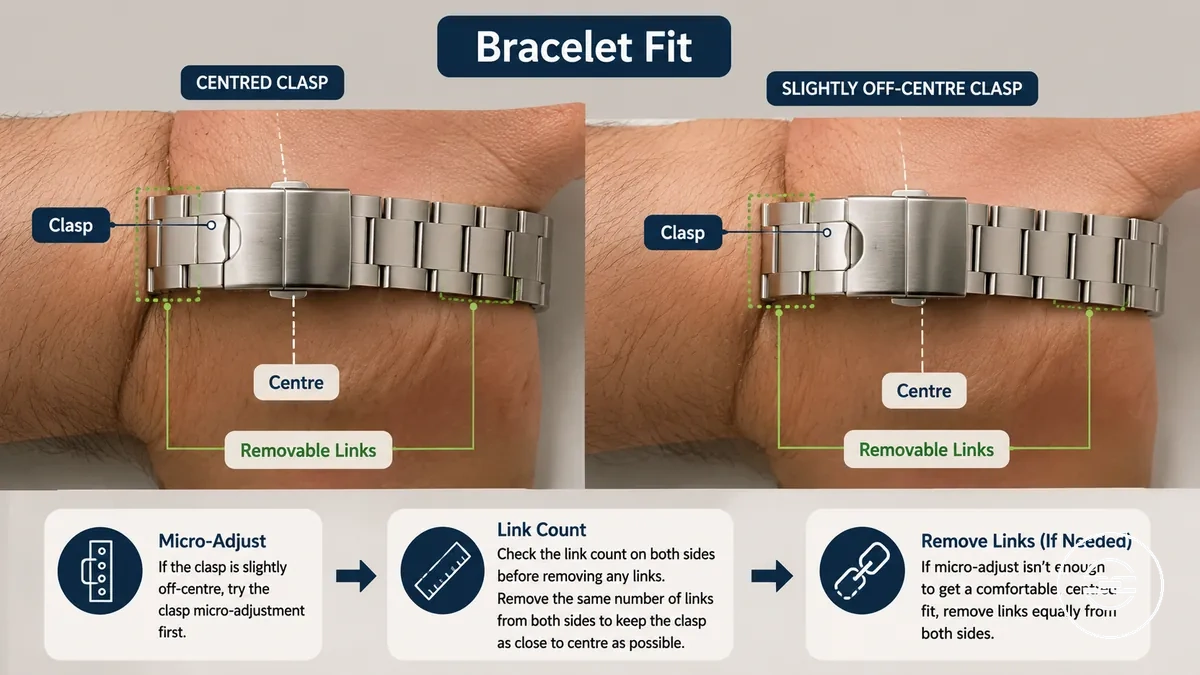
The checklist below verifies Fit checks before removing watch band links before changing bracelet length. For broader measuring guidance after these checks, see metal watch band sizing.
- Check whether bracelet length creates a loose fit or a tight fit during normal wear.
- Confirm that the clasp position sits close to the centre of the underside of the wrist.
- Consider whether wrist swelling changes the daily fit before removing links.
- Identify the available removable links before deciding on the required link count.
- Plan balanced removal from both sides of the bracelet, when the construction allows it, to help maintain clasp position.
- Use clasp micro-adjustment for small fit corrections when available before removing watch band links.
Clasp micro-adjustment for small fit changes
Clasp micro-adjustment for small fit changes can help correct a minor fit issue without removing links when the clasp design supports it. Clasp micro-adjustment changes clasp position rather than bracelet structure.
Check whether the clasp uses clasp holes and a spring bar or a sliding clasp that allows a small bracelet length change. If no adjustment holes or slider range remain, stop the clasp adjustment and consider whether link removal is needed.
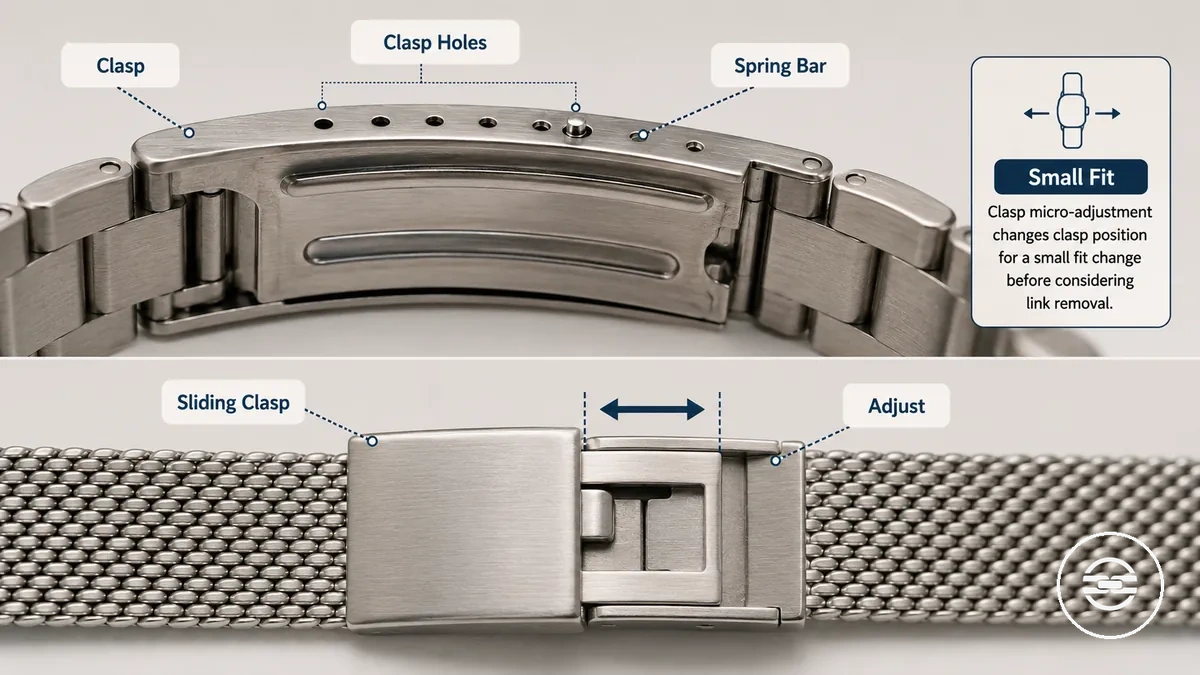
- Use clasp holes with a spring bar when the clasp provides fine adjustment positions.
- Use a sliding clasp on a compatible mesh bracelet to make a small fit change by repositioning the clasp.
- Choose clasp micro-adjustment before link removal when only a small bracelet length change is needed.
- If minor looseness remains after the available clasp adjustment, link removal may be the more suitable next step.
Link removal for loose metal bracelets
Link removal is appropriate when a loose bracelet still needs a shorter bracelet length after any available clasp adjustment has been considered. Confirm that the bracelet has removable links and stop if shortening it may make the wrist fit too tight.
The checklist below helps decide whether to remove one link, use balanced removal, stop, or seek professional help.
- Remove one link when a small reduction in bracelet length may improve wrist fit.
- Use balanced removal from both sides, when the bracelet design allows it, to support clasp centering.
- Check the link count before removing more removable links so the bracelet is not shortened more than needed.
- For example, removing matching links from each side may keep the clasp closer to the wrist centre than removing them from one side only.
- Stop link removal if the clasp is centred and the bracelet feels comfortable.
- Consider professional help if the bracelet remains loose or the removable link arrangement is unclear.
Tools and parts for safe metal watch band adjustment
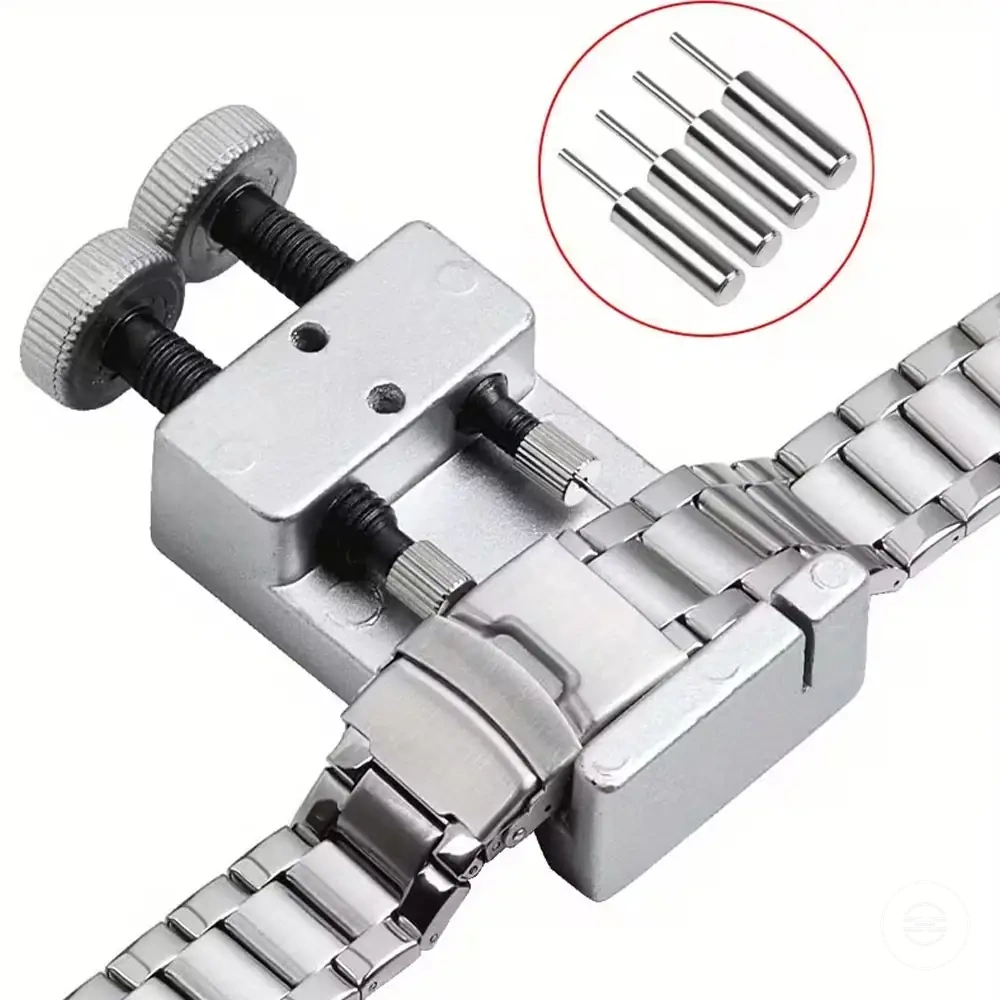
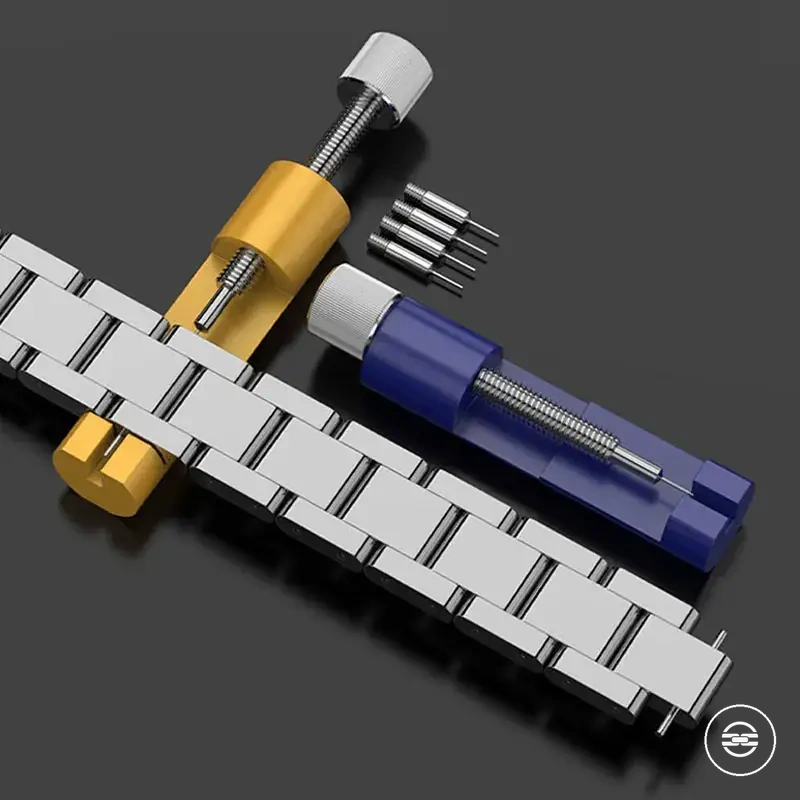
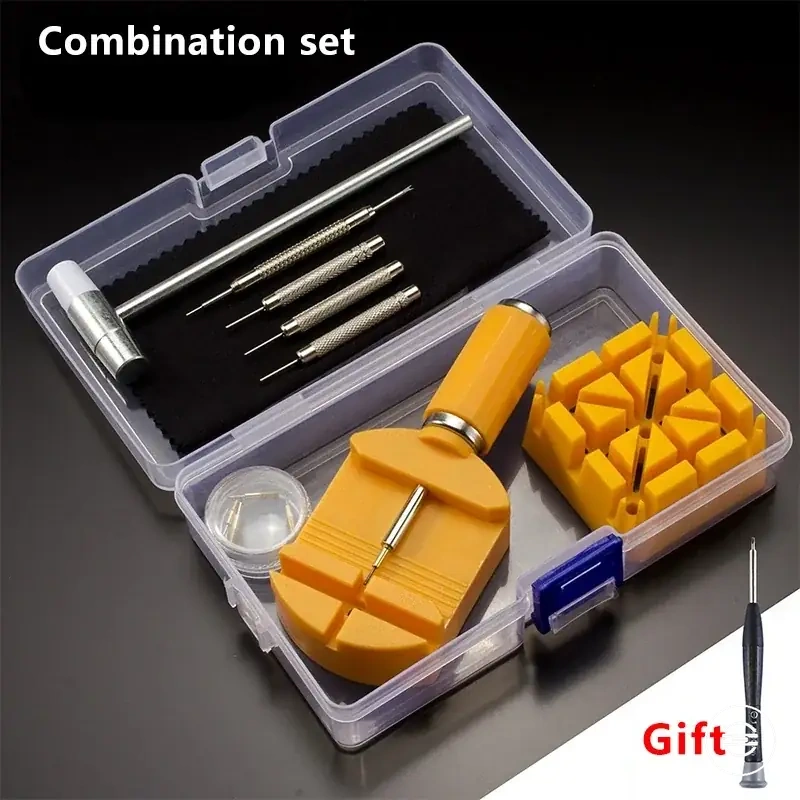
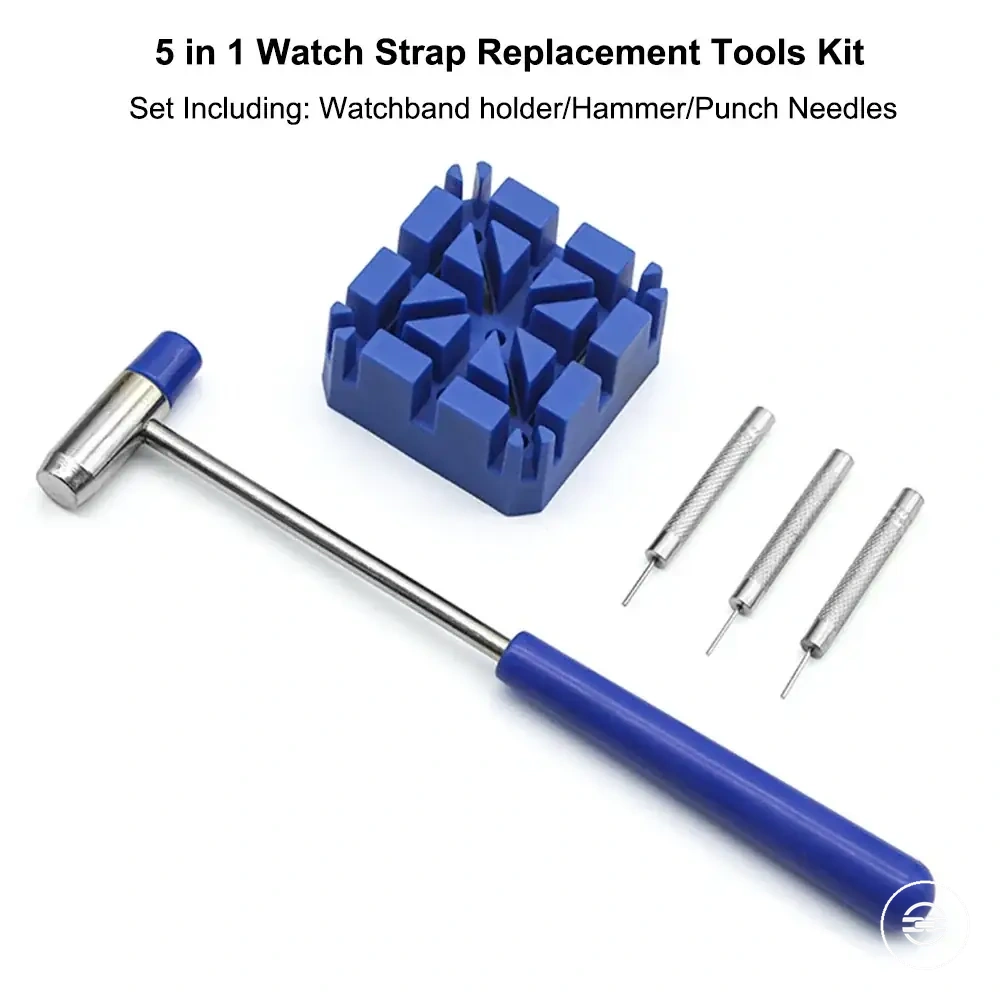
Tools and parts should match the bracelet component before any force is applied. A pin pusher, link remover, spring bar tool, or small hammer may suit different pin or link systems, depending on the bracelet design. Check the part being handled first because using the wrong tool or approach can increase damage risk.
The table below identifies common tools and bracelet parts, what to check before use, and how each handling rule relates to possible damage risk.
| Part or tool | What to check | Handling rule | Damage risk |
|---|---|---|---|
| Pin pusher | Pin direction and arrows | Press pins in the indicated direction when arrows are present. | Poor tool angle may bend pins. |
| Link remover | Removable links and link count | Use it only on removable links that match the bracelet system. | Incorrect alignment may scratch links or damage the adjustment point. |
| Spring bar tool | Spring bar position | Support the spring bar before releasing or refitting it. | A slipping tool may scratch the watch bracelet or case. |
| Small hammer and bracelet block | Bracelet support | Keep the bracelet supported while driving pins. | Poor support may misalign collars or mark the bracelet. |
| Screw links | Screw head type | Use a screwdriver that matches the screw head. | An incorrect fit may damage the screw head. |
Bracelets may use collars, arrows, screw links, or different pin systems, so the handling method depends on the parts being adjusted. If the tool does not match the pin or link system, or if poor tool angle could bend pins, scratch links, or misalign collars, stop and confirm the bracelet construction before applying more force.
Pin pushers, link removers, and resizing kits
Pin pushers, link removers, and resizing kits should match the bracelet pin system and the support needed during adjustment. The chosen tool should provide a stable contact point, controlled pressure, and firm bracelet support. Stop if the tool tip does not match the pin or the bracelet cannot be held securely.
The guide below shows how each tool supports pin movement and risk reduction.
- Pin pusher: Place the tool tip on the pin head and apply steady pressure to reduce the risk of slipping or bending the pin.
- Link remover: Use the holder to keep the bracelet aligned while the pin is pushed. A stable link remover is usually easier for beginners than improvised pushing tools because it improves bracelet support and pressure control.
- Resizing kit: Select only the tool that matches the bracelet pin or link system, because kit contents may not suit every metal band.
- Bracelet support: Keep the links supported during pin movement to reduce scratch risk and unwanted movement.
Removable links, arrows, pins, and collars
Removable links, arrows, pins, and collars show how a bracelet may separate and reconnect during adjustment. Check these markings and small parts before applying pressure because pin systems and link orientation can vary. Stop if the bracelet construction or a loose component cannot be identified.
The checklist below shows how arrows and collars guide pin movement and reassembly. A broader overview of metal watch band links and pins can help clarify the component types after the local bracelet layout is confirmed.
- Removable links: Check which links are marked or designed for link removal.
- Arrows: Follow the arrow direction when present because it indicates the intended direction of pin movement.
- Split pins: Keep the original insertion direction in mind when reinstalling the pin so the link orientation remains consistent.
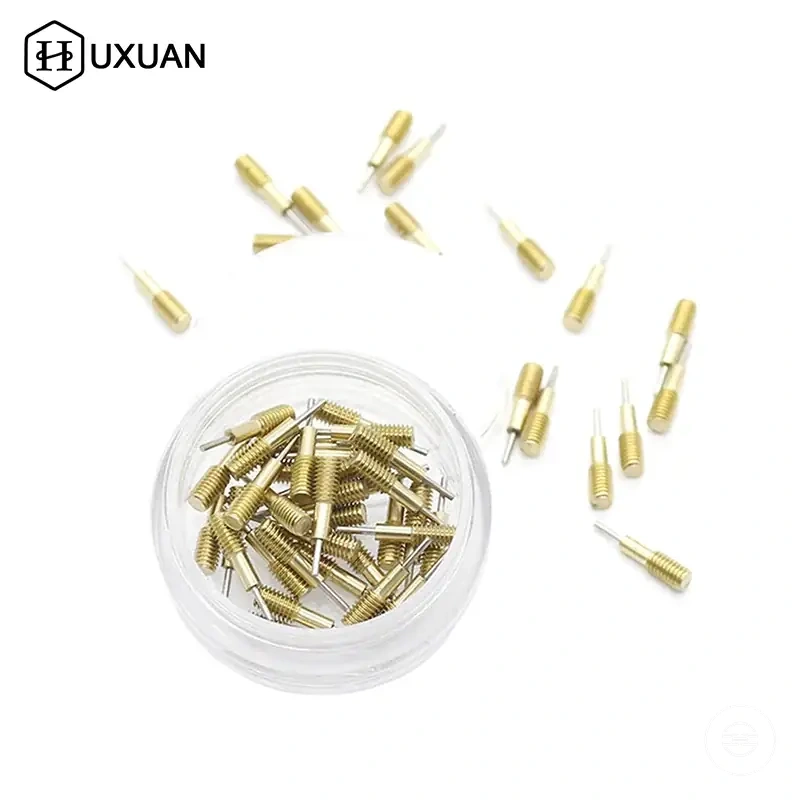
- Collars: Watch for small collars during disassembly because they may fall out, reverse position, or be missed on some bracelets.
- Screw heads: Identify screw links before applying pressure so screw heads are not treated as push pins.
How to remove links from a metal watch band
To remove links from a metal watch band, follow a controlled order so the bracelet stays aligned and small parts are not lost. Check the pin direction before applying pressure, and stop if the pin system or link orientation cannot be identified.
The steps below organise the link-removal workflow from workspace setup through fit recheck.
- Prepare a clean, well-lit workspace and place the bracelet on a stable support so the links cannot shift during adjustment.
- Position the bracelet flat, identify the removable links, and mark the links to remove only after checking that the planned change keeps the bracelet balanced.
- Check the pin direction and any arrows before applying pressure; stop if the removal direction is not clear.
- Remove the pin with controlled pressure while supporting the link. If the bracelet uses a pin-and-collar system, keep the collar secure and note its position before link separation.
- Separate the selected links while keeping the remaining bracelet aligned, and stop if the links resist after the pin has been removed.
- Reconnect the bracelet by returning the pin, collar, or screw to its original orientation. If the bracelet uses screw links, align the links before tightening the screw.
- Complete a fit recheck by fastening the bracelet and checking wrist fit, balance, and link movement before wearing the watch.
If the bracelet does not reconnect cleanly or the fit recheck shows uneven tension, stop and confirm the pin, collar, screw, and link orientation before applying more pressure.
Lay out the bracelet and mark the links to remove
Bracelet layout should be completed before any pin is pushed so the adjustment stays balanced and small parts remain easy to track. Place the bracelet on a soft surface, identify the removable links, and mark links only after confirming the bracelet layout. Stop if the removable-link arrows or link arrangement cannot be identified.
The steps below organise the layout and marking process before link removal.
- Position the bracelet: Lay the bracelet flat on a soft surface and check that the clasp is fully visible before marking any links.
- Check clasp centering: Plan to remove removable links evenly from both sides when possible to help maintain clasp centering. For example, mark one link on each side if equal removal keeps the clasp centred.
- Mark links: Mark links only after confirming the removable-link arrows and the planned bracelet balance.
- Protect small parts: Keep small parts in a visible tray or container so they remain easy to identify before continuing. Stop if any small part is missing before moving to the next step.
Push pins in the marked direction
Push pins only in the marked direction so the bracelet pin follows its intended path and the link is less likely to be damaged. Check the arrows or the visible pin shape before aligning the pin pusher, then apply steady pressure. Stop if the marked direction cannot be confirmed or the resistance feels abnormal.
The steps below keep the pin movement controlled before link separation.
- Check the arrows: Align the bracelet so the arrows point in the direction the pins should be pushed, and confirm the marked direction before applying pressure.
- Align the pin pusher: Place the pin pusher squarely against the pin and support the bracelet so the tool remains aligned during the adjustment.
- Apply pressure: Use steady pressure and light tapping only if needed to begin pin movement. Stop if the resistance increases instead of easing.
- Reinstalling pins: Push pins out in the marked direction, but complete reinstalling pins from the opposite direction when reconnecting the bracelet. Check that each pin is fully seated before continuing.
Remove balanced links from each side of the clasp
Remove balanced links from each side of the clasp to help keep the bracelet centred on the wrist and maintain wrist comfort. Start with the smallest planned link count, then complete a test fit before removing more links. Stop if removing additional links from one side would shift the clasp too far from the centre.
The steps below help keep the bracelet balanced during link removal.
- Plan the link count: Decide how many balanced links to remove and compare each side of the clasp before making changes.
- Keep symmetry: Remove balanced links from each side when possible so the clasp remains centred and wrist comfort is maintained.
- Test fit first: Remove one link first, fasten the bracelet, and complete a test fit before deciding whether more links are needed.
- Adjust carefully: If more than one link must be removed, remove one link from each side to preserve symmetry whenever possible. Stop if uneven removal noticeably shifts the clasp or reduces wrist comfort.
Reconnect the bracelet and secure the pins
Reconnect the bracelet by aligning the remaining links before inserting and securing the pins. Check the link alignment, pin or collar orientation, and seat each pin gently until the flush pin ends are even with the link surface. Stop if the pin, collars, or link alignment does not match before applying more pressure.
The steps below complete the bracelet reassembly before fit testing.
- Align the links: Hold the bracelet links in position and confirm the holes line up before inserting the pin or collars.
- Secure pins: Seat the pins gently and check that the flush pin ends are even on both sides rather than assuming the bracelet is secure because a pin entered the hole.
- Check clasp closure: Close the clasp and confirm it latches normally while the bracelet moves freely without loose links.
- Inspect uneven parts: If collars, screws, or pins do not sit evenly after reassembly, stop and correct the alignment before proceeding to the test fit.
How to check the fit after resizing
Check fit after resizing only after the bracelet has been fully reconnected and the clasp closes normally. Test the watch during natural wrist movement and judge the result by overall comfort because wrist shape, bracelet style, and daily swelling can affect the fit. Stop if the bracelet feels uncomfortable or another adjustment appears necessary.
A successful resizing should keep the bracelet comfortable throughout normal wear without relying on a fixed finger-gap rule. If clasp centering is maintained, skin pressure feels even, and link rattle remains acceptable, the current adjustment may be suitable. If the bracelet is only slightly loose or tight, a micro-adjustment may be a safer choice than removing another link. Reverse the last change or seek professional adjustment if the fit cannot be improved without creating a new comfort or balance issue.
Use the checklist below before wearing the watch regularly.
- Wrist movement: If the bracelet stays comfortable while your wrist bends and rotates, stop. If movement causes binding or excessive shifting, reassess the adjustment.
- Clasp centering: If the clasp remains close to the centre of the underside of the wrist, keep the current sizing. If it shifts noticeably, review the link balance before removing more links.
- Skin pressure: If pressure feels uneven or leaves persistent discomfort, consider a micro-adjustment instead of additional link removal.
- Daily swelling: If the bracelet becomes tight later in the day, wait and recheck before deciding that more links should be removed.
- Link rattle: If light link rattle does not affect comfort or stability, no further change may be needed. If movement remains excessive, reverse the last adjustment, use a micro-adjustment if available, or seek professional adjustment.
Common problems during watch band adjustment
Common problems during watch band adjustment usually result from the wrong pin direction, poor tool angle, missing collars, or unsuitable force. Identify the symptom before making another adjustment because the safe next action depends on the bracelet system and the condition of its parts. Stop if the symptom suggests damaged components or an unidentified bracelet system.
Most adjustment problems can be diagnosed by checking how the pins, links, and collars fit together after each step. Look for alignment issues, misplaced collars, or signs that force has affected the parts rather than assuming the bracelet itself is faulty. Stop and seek further assistance if the cause cannot be identified safely.
For problems that continue after these checks, see metal watch band troubleshooting.
| Symptom | Likely attribute issue | Check | Safe next action |
|---|---|---|---|
| Stubborn pins | Incorrect pin direction or poor tool angle | Confirm the arrow direction and tool alignment | Realign the tool and stop if controlled pressure does not move the pin. |
| Bent pins | Pin misaligned during removal or installation | Inspect the pin for visible bending | Replace the bent pin or seek professional adjustment if the pin cannot seat correctly. |
| Loose pins | Pin not fully seated or incorrect assembly | Check that both pin ends sit evenly | Reseat the pin gently and stop if it remains loose. |
| Uneven seating | Misaligned links or pins | Inspect link alignment before applying pressure | Correct the alignment before attempting another adjustment. |
| Missing collars | Collar omitted or misplaced during reassembly | Verify that each required collar is in place | Reinstall the collar before securing the pin, or stop if the bracelet system is unclear. |
| Scratches | Tool slipped or bracelet support was inadequate | Inspect nearby links for fresh marks | Improve tool support and positioning before continuing. |
Stubborn pins that will not move
Stubborn pins may resist movement because of the wrong direction, poor link support, a screw link, dirt, or tight tolerances. Do not increase force until the pin system, support, and tool alignment have been checked. The stop condition is continued resistance after those checks.
- Wrong direction: If the pin does not move, check any direction marker and confirm the tool is pushing from the intended side. Reverse the setup only when the bracelet indicates the opposite direction.
- Unsupported link: If the link shifts or twists under pressure, place it on firm support with space for the pin to exit. Stop if the link cannot remain level.
- Screw link: If the fastener has a visible screw head, it may be a screw link rather than a push pin. Use the matching method or stop if the system is unclear.
- Dirt or tight fit: If the pin begins to move and then binds, inspect the opening for dirt or uneven alignment. Clean the area and realign the tool without repeated hammering.
- Excessive resistance: If controlled pressure causes bending, slipping, or scratches, stop before the pin or link is damaged further.
After checking direction, support, dirt, and tool position, apply only controlled pressure suited to the identified pin system. If resistance remains high or the part begins to deform, stop the adjustment and seek professional help rather than forcing the pin.
Pins that bend, loosen, or sit unevenly
Bent pins, loose pins, or uneven pins usually point to alignment, installation, or missing-part problems after removal or reinstallation. Check the pin, link holes, orientation, and collar before wearing the watch bracelet. Stop if the connection remains unstable because replacement parts or professional help may be required.
- Bent pins: If a pin shows visible deformation, the likely issue is excess pressure or poor alignment. Check its shape and replace it rather than treating a damaged pin as suitable for reuse.
- Loose pins: If a pin moves after installation, a missing collar or incomplete seating may be the cause. Check that all required parts are present and seated correctly before further use.
- Uneven pins: If one end sits higher than the other, wrong orientation or link-hole misalignment may be preventing even seating. Realign the links and confirm the pin direction before applying controlled pressure.
- Incomplete seating: If the pin does not sit evenly within the link, check the collar position and the alignment of the link holes. Stop if the pin cannot be seated without bending or slipping.
After reassembly, check that each pin remains stable and sits evenly during light handling. If a pin loosens again, stays uneven, or shows damage, stop wearing the bracelet until suitable replacement parts are fitted or professional help is obtained.
Damage risks during metal watch band resizing
Damage risks during metal watch band resizing increase when tool pressure, bracelet support, or part identification is incorrect. Scratches, bent pins, lost collars, and stripped screws may result when the adjustment method does not match the bracelet type. Stop before applying more force if the pin system, screw link, or marked direction is unclear.
Support the bracelet so the working link stays level and the pin or screw has room to move. Check the clasp position before removing links because an uneven layout may leave the clasp misaligned on the wrist. Stop if a tool slips, a part begins to deform, or resistance increases after direction and alignment have been checked.
- Scratches: If the tool slips or the bracelet moves on an unsupported surface, pause and improve bracelet support before continuing.
- Bent pins: If a pin starts to curve under tool pressure, stop and check its direction, alignment, and condition rather than forcing it further.
- Lost collars: If a small collar separates from the link during removal, keep it with the matching parts and do not reassemble the link until its position is confirmed.
- Stripped screws: If a screwdriver slips or the screw head begins to deform, stop and confirm that the tool fits the screw link before another attempt.
- Misaligned clasp: If link removal would leave the clasp off-centre, review the link balance on both sides before shortening the bracelet further.
- Pressure against the marked direction: If a pin resists movement, check the bracelet markings and reverse the setup only when they show a different removal direction.
Visible bending, repeated tool slipping, damaged screw heads, or an unidentified fastening system are stop cues. Continuing under those conditions may make the damage harder to correct, so suitable replacement parts or professional adjustment may be the safer next step.
When professional adjustment is safer
Professional adjustment is safer when the bracelet cannot be resized confidently without raising the risk of damage. Stop home adjustment if the link system cannot be identified, parts become damaged, or repeated attempts fail. A jeweller or watch technician is the safer next step when the fastening method or bracelet condition remains uncertain.
- Luxury watches: If the bracelet finish or construction may be easily damaged, stop before applying more tool pressure and use a jeweller or watch technician.
- Unfamiliar link system: If you cannot identify whether the bracelet uses pins, screws, collars, or another fastening method, stop until the system is confirmed.
- Stripped screws or damaged pins: If screw heads begin to strip or pins become damaged, stop rather than forcing further removal or reinstallation.
- Missing collars: If a collar is lost during link removal, do not reassemble the bracelet until the correct part and position are confirmed.
- Integrated bracelets or repeated failed attempts: If the bracelet has an integrated design or careful attempts have not worked, use professional adjustment rather than increasing pressure.
These conditions are stop cues because further tool pressure may increase scratch risk or leave the links unstable. If the unfamiliar link system remains unclear or the bracelet cannot be secured after careful checks, stop and use a jeweller or watch technician.
Questions about adjusting metal watch bands at home
FAQ: Can I remove links without tools? You may be able to remove links without specialist tools only when the bracelet system can be handled without excess pressure or slipping. Most pin, collar, and screw systems still need suitable tools and firm bracelet support. Stop if the fastening method is unclear or the available tool cannot engage the part securely.
Do I need special tools to adjust at home? You may need special tools when the watch bracelet uses push pins, collars, or screw links. The tool should match the fastening system and allow controlled pressure without damaging the links. Do not continue with an improvised tool if it slips, bends a pin, or marks the bracelet.
What pin direction should I follow? Follow the pin direction shown by arrows on the underside of the bracelet when those markings are present. Push the pin in the marked removal direction and note its orientation before reassembly. If no direction is marked and the pin system cannot be identified confidently, stop rather than forcing it.
When can I make a tighter band without removing links, and when should I seek professional help? A tighter band may be possible without link removal when the clasp has an adjustment position or the bracelet includes a smaller adjustment link. The available option depends on the clasp and bracelet construction. Seek professional help if the system is unfamiliar, parts are damaged or missing, or careful adjustment attempts keep failing.
The products below are useful examples for comparing available options. Before buying, check that the compatibility criteria, key features, and product details match your needs.